


Share to:
We aren’t a gluten-free family, but this gluten-free chocolate brownie recipe is still one of my all-time favourites. I make these brownies year-round and always as part of my Christmas baking because everyone loves them.
They freeze really well, so during the holiday season I always have a batch in the freezer so I can pull a few out when guests pop by.
The hard ganache means I can pile them high on a platter when I’m putting out an assortment of goodies. Or I can pop them in the oven at a low temperature to warm them up slightly, add some ice cream and berries and create an easy crowd-pleasing plated dessert.

Gluten-Free Chocolate Brownie Recipe
Ingredients
- 375 grams Dark Callebaut chocolate
- 345 grams Butter
- 6 Eggs
- 480 grams Brown Sugar
- 190 grams Almond Flour
- 98 grams Brown Rice Flour
- 7 grams Salt
- 5 grams Baking Soda
- 6 ml Vanilla
- 3/4 cup Chopped Dark Callebaut Chocolate
Method
- Preheat your oven to 350F, cover a 1/2 sheet pan in parchment. The parchment should come up over all sides. (This will act as a handle to help you remove the brownies from their pan after they’re baked.)
- In a medium bowl, combine the almond flour, brown rice flour, salt and baking soda. Mix and set aside.
- Chop the 475 grams of dark chocolate into small chunks, cut the butter into small pieces.
- In a large bowl, melt the butter and chocolate together over a *bain-marie. Don’t stir until everything is mostly melted.
Bain-marie= fill a saucepan with 1″ or 2″ of water and bring it to a gentle boil on the stovetop. Place the bowl with the butter and chocolate on top of the saucepan and allow the heat from the water to melt the ingredients. Make sure the water isn’t touching the bottom of the bowl when it is boiling.
- Add the sugar to the melted chocolate and mix well.
- In a separate bowl, lightly beat the eggs.
- Slowly add about a quarter of the eggs to the chocolate/sugar mixture mixing constantly. Once combined, continue to add the remaining eggs.
- Fold in the dry ingredients.
- Fold in the extra chopped chocolate.
- Pour into your pan and bake for 25-30 minutes.
- Allow to cool before lifting it onto your cutting board.
Hard Chocolate Ganache
Ingredients
250 grams Dark Callebaut Chocolate
125 ml Cream
Method
- Chop the chocolate into small pieces.
- Place into a small/medium metal bowl.
- Bring the cream to a boil in a small saucepan.
- Once the break is boiling, pour the cream over the top of the chocolate and cover immediately with plastic wrap. Swirl cream to make sure it covers all of the chocolate, and then let it sit for 5 minutes.
- After five minutes, use a whisk and beat the chocolate and cream together.
- Once the ganache is smooth, pour over the brownies and use a large offset spatula to spread evenly.
Portioning
- Allow the brownies to cool completely before cutting.
- Fill a pitcher with boiling water.
- Dip your largest knife into the boiling water, and then dry it. You will do this after each cut.
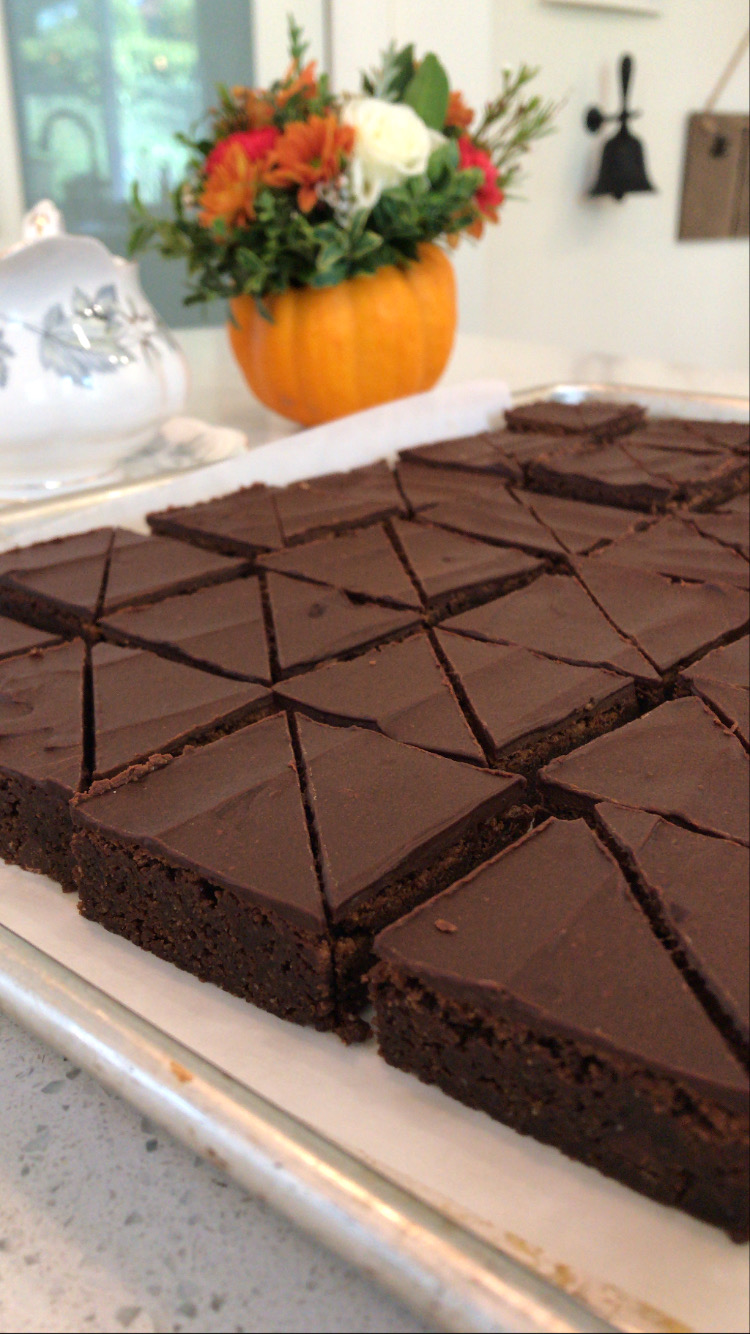
Yes, this is very “extra” and takes a long time, but this is what makes your brownies look professionally made. 😘 - Cut all of the edges off the brownie to make a clean line.
Bonus- you get to eat these right away! - I measure 2″x 2″ squares and then cut them diagonally into triangles. The last line is always a little smaller so that gets saved for my family.
Freezing Brownies
I freeze these brownies on a sheet pan that is covered in parchment and then wrapped in plastic.
Once they are frozen, I transfer them into Tupperware containers. You just need to put parchment between the layers of brownies but because of the hard ganache, you can stack them with no problems.
To thaw them just take them out of their container and either place them straight on your serving platter or put them on a cooling rack.
Dangerous Bonus tip
They also taste amazing when they are frozen.
Enjoy!
Christine
Be the first to comment